WebAuthn / FIDO 2 Demo: Difference between revisions
(Created page with "== Intro == GTRI has deployed a very simplistic demo of the [https://github.com/sipatel2/shibboleth-webauthn Duke University WebAuthn plugin] for Shibboleth 4.1 in the NIEF Te...") |
No edit summary |
||
| (15 intermediate revisions by the same user not shown) | |||
| Line 9: | Line 9: | ||
This page will have a UI that looks like this: | This page will have a UI that looks like this: | ||
[[File:reg.png]] | [[File:reg.png|center|Screen shot of the registration page]] | ||
# Put in ''testuser01'' for the Username. | |||
# Put in any menaingful description for the the Device ID, such 'Tom Jane's iPhone'. | |||
# Click <font style="background-color:#071A64;color:#FFFFFF;">Register device with WebAuthn</font> | |||
== Device Authentication == | |||
Upon clicking the button, your device should present you it's user interface for enabling authentication. This will vary by device, and while it may work on desktops, it's less often supported then it is on mobile devices. The initial screenshot on a typical 2020 android device looks like this: | |||
[[File:key1.png|center|Cell phone screen shot of using the devices security key.]] | |||
In the above screenshot, the user would click "Get Started". Your device should hopefully have an equally intuitive option. | |||
Next you will be prompted to choose a method for using the key, essentially how the device will authenticate you and unlock the key on future use. This will also vary greatly from device to device in terms of the options available. And in some cases there will be no available mechanisms to use and an error may be generated. On a typical 2020 android device this next screen looks like this: | |||
[[File:key2.png|center|Cell phone screen shot of configuring the devices security key.]] | |||
For the demo day, likely using the screenlock mechanism will be used unless additional devices are provided such as NFC based webauthn tokens or perhaps PIV-I card readers that work with mobile devices. | |||
== IDP Confirmation == | |||
If your device supports a way to protect and authenticate to the IDP in future logins, you should get a registration successful message: | |||
[[File:success.png|center|Screen shot of successful registration.]] | |||
If your device doesn't support webauthn in a way that is compatible with the server you will get an error message like the following: | |||
[[File:fail.png|center|Screen shot of failed registration.]] | |||
== Test SSO == | |||
The final step is to actually authenticate to the IDP using the WebAuthn credential. Test this with the following link [https://assure.ref.gfipm.net/idp/profile/SAML2/Unsolicited/SSO?providerId=https%3A%2F%2Ftestsp.nief.org%2Fshibboleth&target=https%3A%2F%2Ftestsp.nief.org%2Fprot Login to NIEF Test SP] | |||
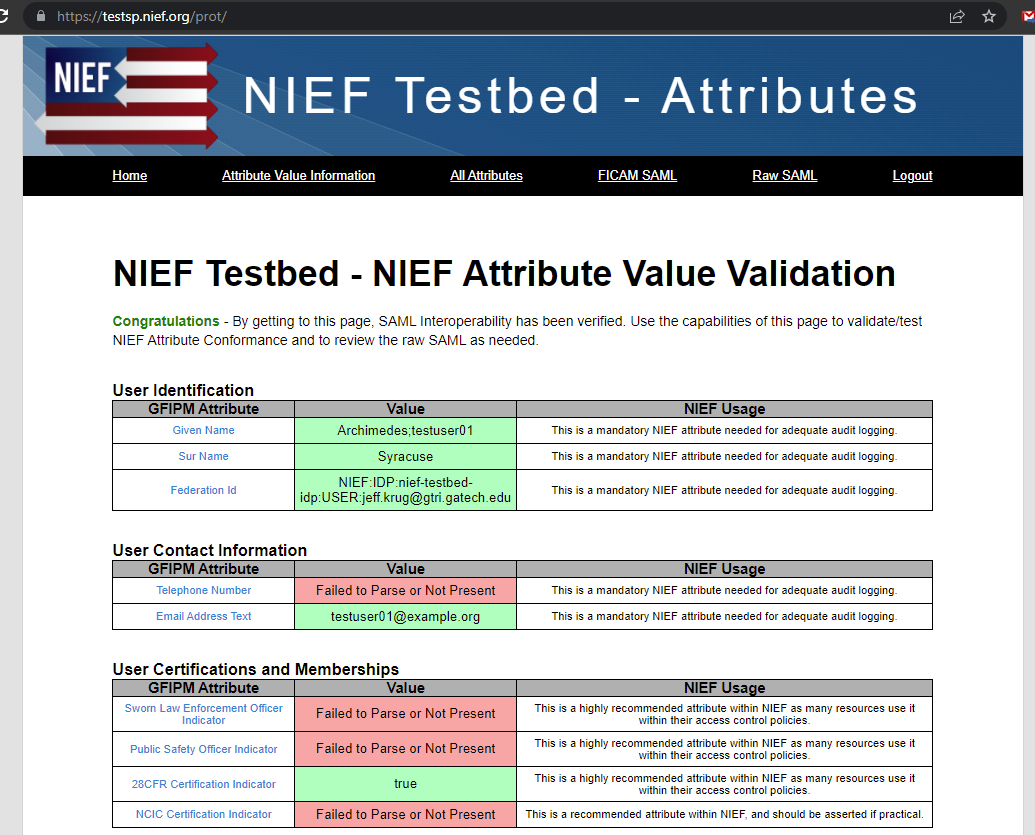
The first time you do this, you will need to type in 'testuser01' again. And then when you click continue, your device will take over to unlock your webauthn / FIDO2 key. After you authenticate to your device, your device will authenticate to the IDP and you should be redirected to the NIEF Test SP where you will see a page that looks like the following: | |||
[[File:sso.png|center|Screen shot of the NIEF Test SP - SSO landing page and attribute review page.]] | |||
Latest revision as of 22:14, 21 February 2022
Intro
GTRI has deployed a very simplistic demo of the Duke University WebAuthn plugin for Shibboleth 4.1 in the NIEF Testbed environment. This page provides a short explanation of how to verify that demo works for your device.
Device Registration
From a web browser on the device you must go to the registration URL. With production usage this URL would require some sort of pre-existing authentication or only be available during some sort of in-person registration process. For this demo, it is simply open to the world:
https://assure.ref.gfipm.net/idp/webauthn/registration
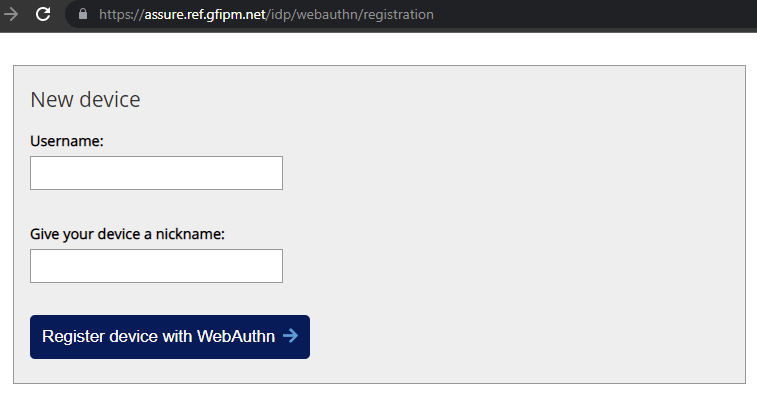
This page will have a UI that looks like this:
- Put in testuser01 for the Username.
- Put in any menaingful description for the the Device ID, such 'Tom Jane's iPhone'.
- Click Register device with WebAuthn
Device Authentication
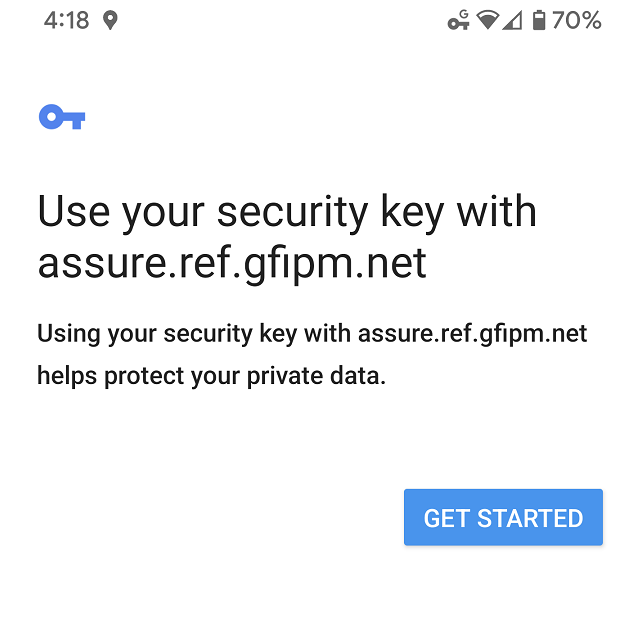
Upon clicking the button, your device should present you it's user interface for enabling authentication. This will vary by device, and while it may work on desktops, it's less often supported then it is on mobile devices. The initial screenshot on a typical 2020 android device looks like this:
In the above screenshot, the user would click "Get Started". Your device should hopefully have an equally intuitive option.
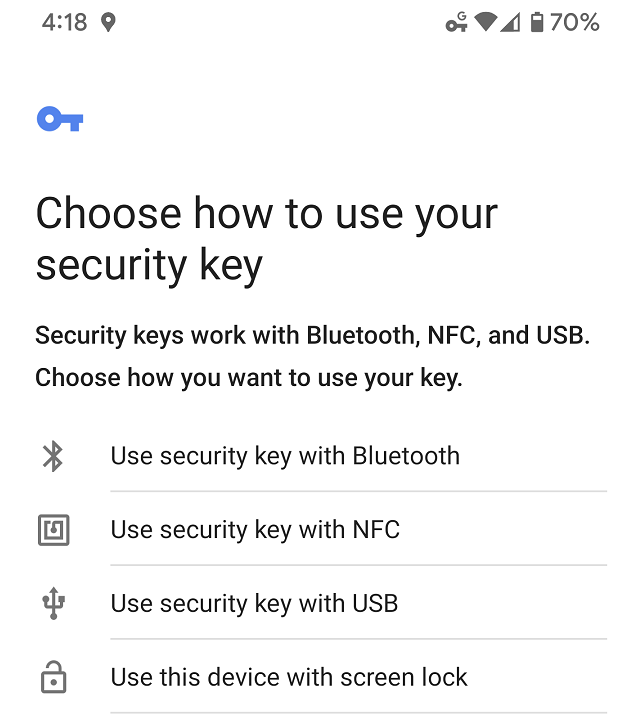
Next you will be prompted to choose a method for using the key, essentially how the device will authenticate you and unlock the key on future use. This will also vary greatly from device to device in terms of the options available. And in some cases there will be no available mechanisms to use and an error may be generated. On a typical 2020 android device this next screen looks like this:
For the demo day, likely using the screenlock mechanism will be used unless additional devices are provided such as NFC based webauthn tokens or perhaps PIV-I card readers that work with mobile devices.
IDP Confirmation
If your device supports a way to protect and authenticate to the IDP in future logins, you should get a registration successful message:
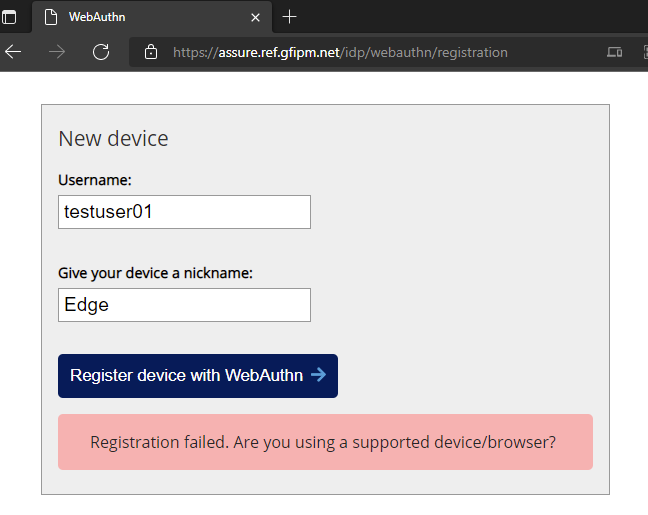
If your device doesn't support webauthn in a way that is compatible with the server you will get an error message like the following:
Test SSO
The final step is to actually authenticate to the IDP using the WebAuthn credential. Test this with the following link Login to NIEF Test SP
The first time you do this, you will need to type in 'testuser01' again. And then when you click continue, your device will take over to unlock your webauthn / FIDO2 key. After you authenticate to your device, your device will authenticate to the IDP and you should be redirected to the NIEF Test SP where you will see a page that looks like the following:
